The Universal Recommender
I’ll assume if you’re reading this that you’re already at least familiar with Universal Recommender, the most popular ML engine for PredictionIO. If you’re not sure what either of those things are we’ll have a separate post on those in the near future.
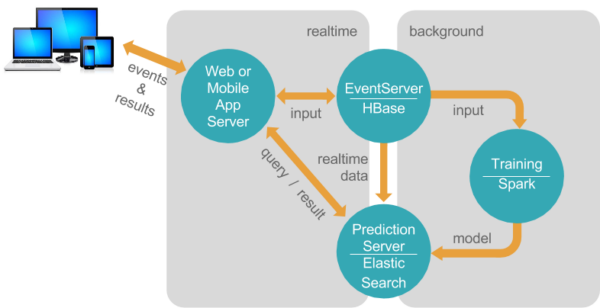
The creators of Universal Recommender (Pat Ferrel and the team at ActionML) make it super easy to get started trying out their algorithm, loading in some of your own data, training, and getting personalized recommendations back out. You can just spin up an EC2 instance preloaded with everything you need and get off to the races. This is a great option for anyone who doesn’t really need to know the configuration details right away, doesn’t mind paying a little bit to avoid the setup effort, and doesn’t need the latest versions of Universal Recommender and PredictionIO.
For people wanting to save some money and dig in, or those who like to stay on the bleeding edge, this guide will document in detail the steps necessary to get the latest and greatest Universal Recommender (0.7.0) and PredictionIO (0.12.0) up and running in a virtual machine. I could have done this on EC2 just as easily, but figured I’d do this in the simplest, cheapest fashion possible.
First things first — there are several good options for virtual machine software out there and it shouldn’t matter which you use. I use Parallels on my MBP, but VirtualBox and VMWare are also options. Whatever you prefer to use, install Ubuntu 16.04 Server on it. I’d go with at least:
- 2 CPU Cores
- 8GB ram
- 16GB HDD
PredictionIO and Universal Recommender are designed explicitly to work well with big data, so small amounts of RAM won’t cut it even for trivial pilot projects. Even at 4GB you’ll likely need swap space to keep from crashing while training the models.
NOTE: I chose the username “ubuntu” during OS installation - if you use something different be aware that you’ll need to tweak any hardcoded paths found below.
Installation Steps
Buckle up, there’s 14 high-level steps to get through to get this up and running. If things go well and you’ve got a good internet connection, you should be able to get this done in an hour and a half, tops.
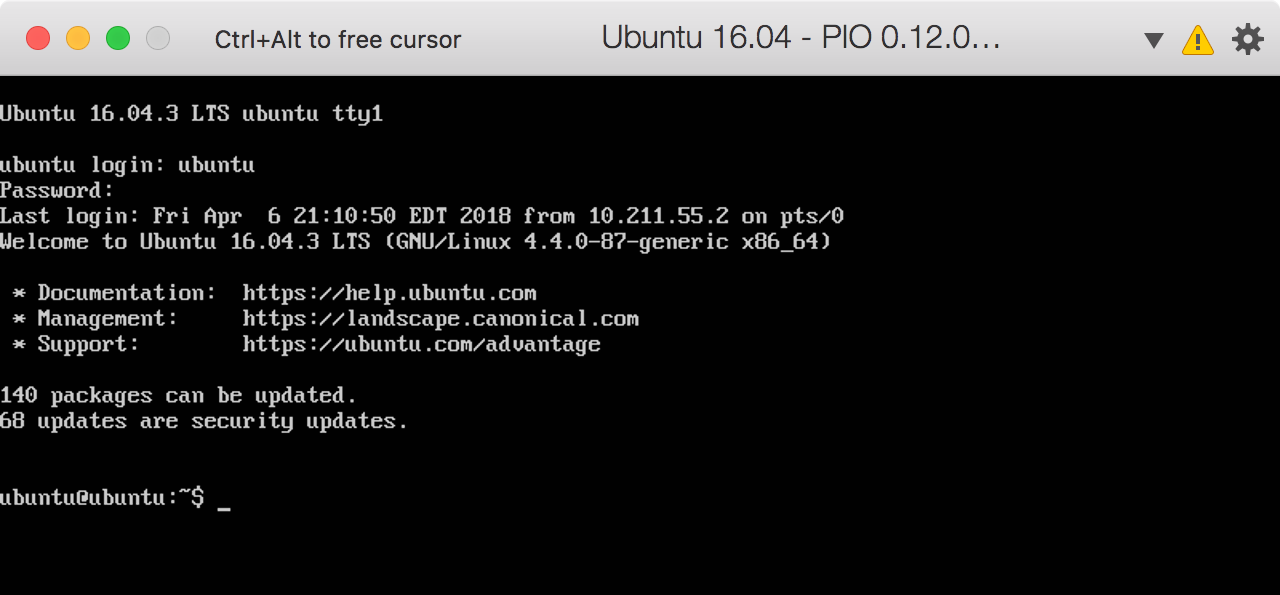
We begin by staring at a blank command prompt. Let’s get on with it…
1. Install Java 8 SDK
Install using apt-get:
$ sudo apt-get install openjdk-8-jdkEdit ~/.bashrc and add this line to the end:
$ export JAVA_HOME=/usr/lib/jvm/java-8-openjdk-amd64Source the updated file then make sure the version number matches the number output during the installation…
$ source ~/.bashrc
$ java -version
2. Install scala 2.11
Download and install the Scala package from their website since it’s not available from apt-get:
$ sudo wget www.scala-lang.org/files/archive/scala-2.11.12.deb
$ sudo dpkg -i scala-2.11.12.deb
Make sure it’s all setup by checking the version…
$ scala -version3. Install SBT (Scala Build Tool)
SBT is available through apt-get, but you need to do a few extra steps to add the apt repository:
$ echo "deb https://dl.bintray.com/sbt/debian /" | sudo tee -a /etc/apt/sources.list.d/sbt.list
$ sudo apt-key adv --keyserver hkp://keyserver.ubuntu.com:80 --recv 2EE0EA64E40A89B84B2DF73499E82A75642AC823
$ sudo apt-get update
$ sudo apt-get install sbt
4. Python setup
It’s already installed, check your version:
$ python3 -VInstall libraries needed for the test scripts
$ sudo apt-get install python3-pip
$ pip3 install prediction
Edit ~/.bashrc and add these lines to the end:
# Ensure that the python alias is picked up by bash scripts like the Universal Recommender examples
shopt -s expand_aliases

# Add an alias for python3 so that when PIO calls python there's no chance it uses python 2
alias python=python3
5. Install Git
Install using apt-get:
$ sudo apt-get install git
$ git --version
6. Download and unpackaged PredictionIO
The instructions on the site didn’t work for me. I found a mirror on the official apache site with the source, but that archive doesn’t have a top-level folder, so create a new directory and unzip it there first:
$ mkdir ~/PredictionIO-0.12.0-incubating
$ cd PredictionIO-0.12.0-incubating
$ wget https://www.apache.org/dist/incubator/predictionio/0.12.0-incubating/apache-predictionio-0.12.0-incubating.tar.gz
$ tar zxvf apache-predictionio-0.12.0-incubating.tar.gz
Add a line to the end of ~/.bashrc to add the PIO bin directory to the PATH variable:
# Add PIO bin directory to make starting, stopping, and status easier from anywhere...
export PATH="/home/ubuntu/PredictionIO-0.12.0-incubating/bin:$PATH"
Activate the new bash settings:
$ source ~/.bashrc7. Install Dependencies
All the sub-systems required for PredictionIO will be downloaded and installed in the PredictionIO directory
Create the directory and cd into it:
$ mkdir vendors && cd vendors8. Install Spark 2.1
Universal Recommender is not yet compatible with Spark 2.2, so I had to ignore the directions in the PredictionIO guide.
Download and unpack:
$ wget https://archive.apache.org/dist/spark/spark-2.1.2/spark-2.1.2-bin-hadoop2.7.tgz
$ tar zxvf spark-2.1.2-bin-hadoop2.7.tgz
9.Install Elasticsearch 5.6.6
Download and unpack:
$ wget https://artifacts.elastic.co/downloads/elasticsearch/elasticsearch-5.6.6.tar.gz
$ tar zxvf elasticsearch-5.6.6.tar.gz
10. Install HBase 1.2.6
Download and unpack:
$ wget https://mirrors.ocf.berkeley.edu/apache/hbase/1.2.6/hbase-1.2.6-bin.tar.gz
$ tar zxvf hbase-1.2.6-bin.tar.gz
Update ~/PredictionIO-0.12.0-incubating/vendors/hbase-1.2.6/conf/hbase-env.sh…
uncomment the JAVA_HOME property and set it to /usr
11. Build PredictionIO
Now that we’ve got everything in place we’ll need to update the PIO environment settings file considerably, and then build the source code. This may take a WHILE depending on your VM settings and what else you’ve got running.
Copy the environment file template to the correct file name:
$ cp ~/PredictionIO-0.12.0-incubating/conf/pio-env.sh.template ~/PredictionIO-0.12.0-incubating/conf/pio-env.shFind and update these properties in that file (uncommenting if necessary):
SPARK_HOME=$PIO_HOME/vendors/spark-2.1.2-bin-hadoop2.7
PIO_STORAGE_REPOSITORIES_METADATA_SOURCE=ELASTICSEARCH
PIO_STORAGE_REPOSITORIES_EVENTDATA_SOURCE=HBASE
PIO_STORAGE_REPOSITORIES_MODELDATA_SOURCE=LOCALFS
PIO_STORAGE_SOURCES_ELASTICSEARCH_TYPE=elasticsearch
PIO_STORAGE_SOURCES_ELASTICSEARCH_HOSTS=localhost
PIO_STORAGE_SOURCES_ELASTICSEARCH_PORTS=9200
PIO_STORAGE_SOURCES_ELASTICSEARCH_SCHEMES=http
PIO_STORAGE_SOURCES_ELASTICSEARCH_HOME=$PIO_HOME/vendors/elasticsearch-5.6.6
PIO_STORAGE_SOURCES_LOCALFS_TYPE=localfs
PIO_STORAGE_SOURCES_LOCALFS_PATH=$PIO_FS_BASEDIR/models
PIO_STORAGE_SOURCES_HBASE_TYPE=hbase
PIO_STORAGE_SOURCES_HBASE_HOME=$PIO_HOME/vendors/hbase-1.2.6
Run the build:
$ ./~/PredictionIO-0.12.0-incubating/make-distribution.sh12. Install Maven
Install with apt-get:
$ sudo apt-get install maven13. Build Mahout (the ActionML fork)
Universal Recommender uses a custom version of Mahout maintained by ActionML for a performance boost. Future versions of Mahout may integrate the custom code and this will no longer be necessary.
Clone the ActionML fork from git (doesn’t matter where you save it, I cloned into ~/mahout although I think /usr/local/mahout is a common location):
$ git clone https://github.com/actionml/mahout.gitEdit the ~/mahout/build-scala-2.11.sh script and replace the directories that are hardcoded there (Users/pat) with ours (home/ubuntu)
Run the script and make sure it passes (this may take a little while)
$ ./build-scala-2.11.sh14. Download and build the Universal Recommender
Clone into a new directory and build
$ cd ~/PredictionIO-0.12.0-incubating
$ mkdir engines && cd engines
$ git clone https://github.com/actionml/universal-recommender.git
$ pio build
Validate everything worked
We made it! That was a lot of steps, let’s make sure that everything worked. The following commands should run with no warnings or errors…
$ pio-start-all
$ pio status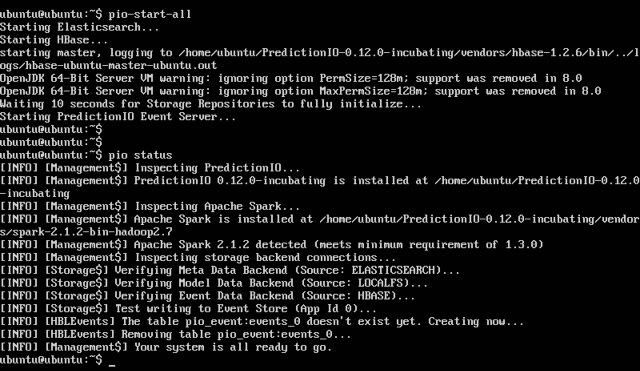
And now you’ve got yourself a running dev instance of PredictionIO with the Universal Recommender installed as an engine!
Any problems with these instructions? Leave a note below and I’ll make sure to update these instructions to cover any omissions